Working with the Vector Index
Introduction
The Vector Index is part of the TopBraid AI Services. It facilitates similarity searches based on AI language models. This document describes how to enable the Vector Index for an asset collection and how to use it for Crosswalks and the AutoClassifier.
Enable the Vector Index
Enabling the Vector Index for an Asset Collection
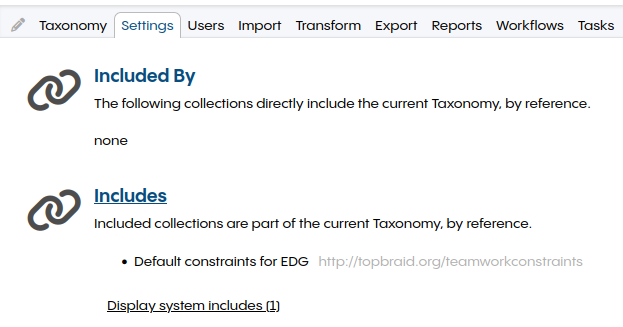
All the TopBraid AI Service features, including the Vector Index, are bundled in the TopBraid AI Service collection that needs to be included.
To do that, go to Settings, Includes:
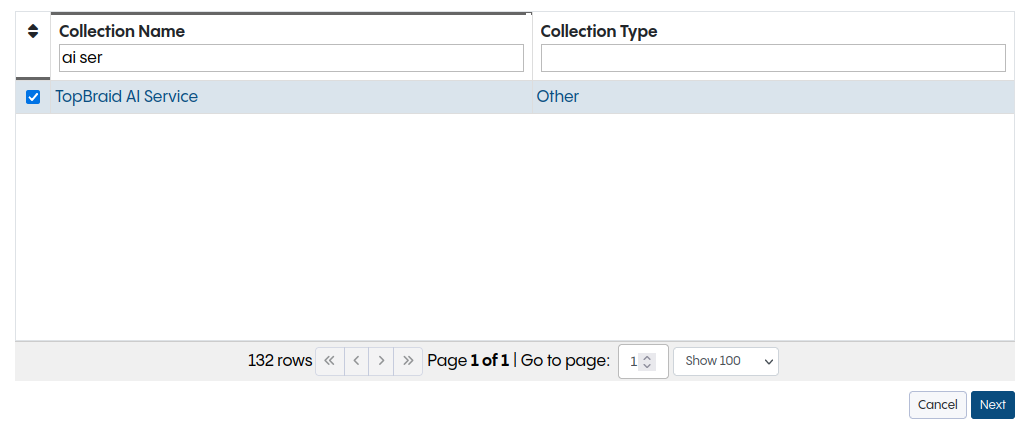
Search on the top by name for AI Service, check it, and press next:
It’s required to define the classes and properties which should be used by the Vector Index.
That configuration can be found on the start page of the asset collection.
On the right, select Vector Index Configuration.

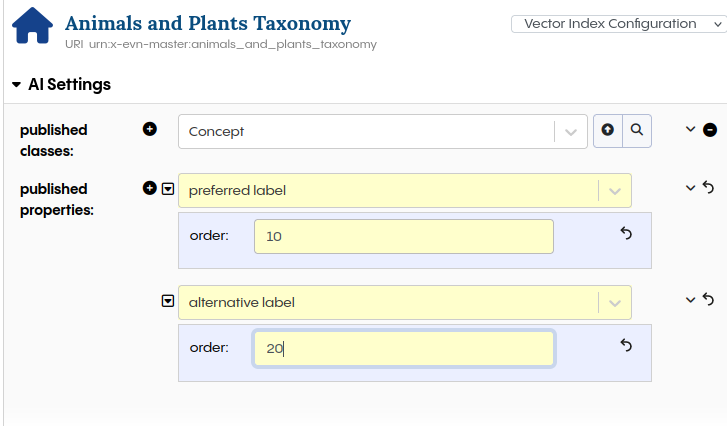
Select the classes that should be indexed.
The screenshot shows an example for a taxonomy.
All instances of Concept will be indexed with the content of the properties preferred label and alternative label.
Additional properties, describing the instance, like description should be added if they are used.
Each instance requires a label for the indexing.
Based on the order, the first property that can be found will be used.
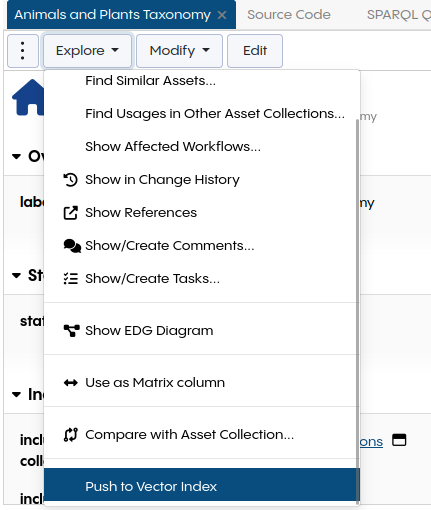
If there are already instances of classes that should be indexed before the index was created, it’s required to push them initially.
This can be done using the Push to Vector Index Explore action shown below.
All changes made after enabling the Vector index will be synchronized automatically.
Changing the Vector Index Configuration
It’s required to reindex the Vector Index when the configuration was changed (classes and properties have been added or removed). To reindex, perform the following steps:
Delete the Vector Index
Create the Vector Index
Push to Vector Index
Using the Vector Index in a Content Tag Set
Any asset collection for which the Vector Index has been enabled can be used by the AutoClassifier in the Content Tag Set. Unlike using Maui Server, this method doesn’t require a training step.
See also
See Content Classification in EDG for a detailed guide on content classification.
After creating a Content Tag Set, the AutoClassifier must be configured.
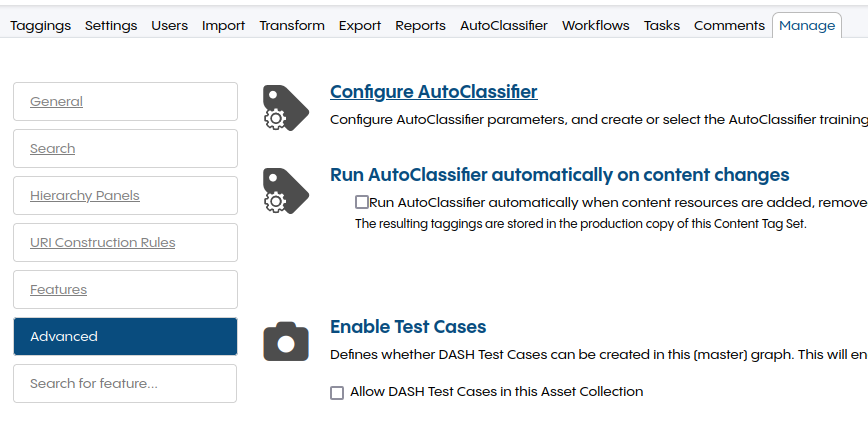
Go to Manage, Advanced, Configure AutoClassifier.
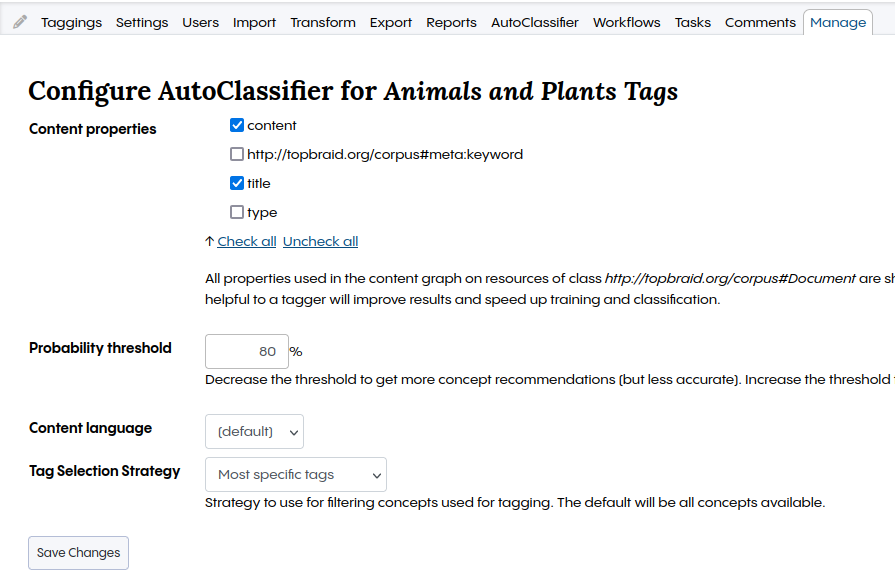
Under Content properties, select all properties with content that should be used by the AutoClassifier.
In this example, content and title are used but other properties like filename can be of interest if the documents have meaningful filenames.
The Tag Selection Strategy acts as a filter on the concepts of the taxonomy.
In this example, only the most specific tags are used to ignore concepts with child nodes.
The Probability threshold must be adapted to the Content Tag Set.
Each combination of a corpus and a taxonomy has their own reasonable threshold.
Check some documents in the Taggings tab to find a good threshold value.
Once finished, press the Save Changes button.
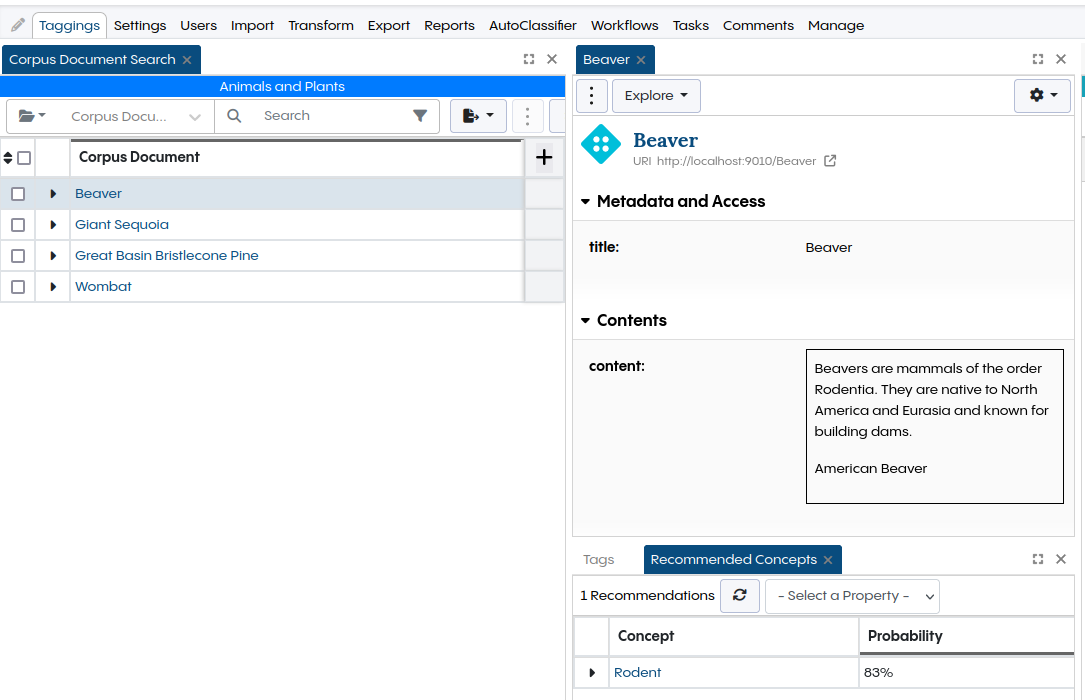
The Taggings tab should show documents from the corpus.
Select one to see concepts found by the AutoClassifier in Recommended Concepts.
Use the Vector Index for Crosswalks
Any asset collection for which the Vector Index has been enabled can be used as a target in a Crosswalk.
See also
See Working with Crosswalks for a detailed guide on the crosswalk asset collection type.
After creating a Crosswalk, the matching method needs to be changed.
That configuration can be found on the start page of the asset collection.
On the right, select Crosswalk Configuration.

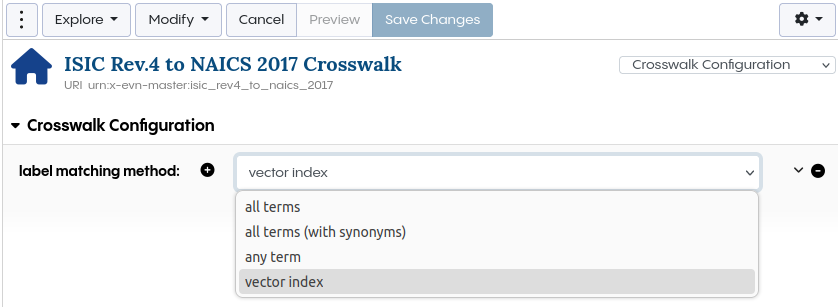
In the Crosswalk configuration, change the label matching method to vector index.
Run the Problems and Suggestions to see the recommendations based on the Vector Index.